CoDeKu DevOps Academy Blog - DevOps & Cloud Blogging Platform

In the world of software development, making changes is inevitable — and sometimes, messy. That’s where Git comes in.
In this beginner-friendly guide, I’ll walk you through Git, the most popular version control system used by developers around the world. Whether you’re a student, freelancer, or team collaborator, mastering Git will help you manage your projects efficiently and confidently.
Table of Contents
- 📘 Introduction to Git
- ⚙️ Features of Git
- 🛠️ Configuration of Git first time
- 🧩 General Git Features
- 📂 Staging Files / Adding Files to Git Repository
- 📝 Making a Commit of Repository
- 📄 Status of Files and Log
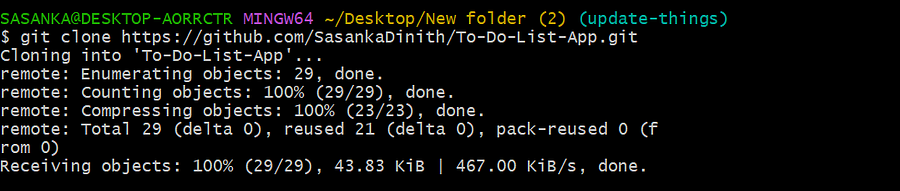
- 🔄 Git Clone from GitHub
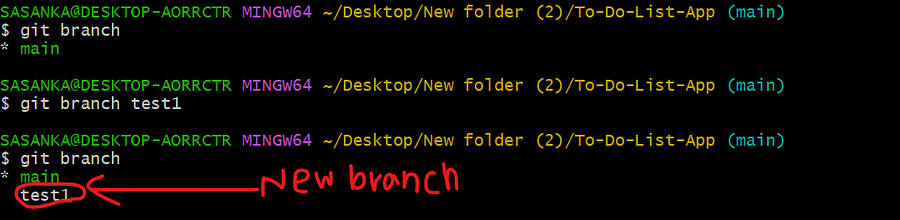
- 🌿 Git Branching
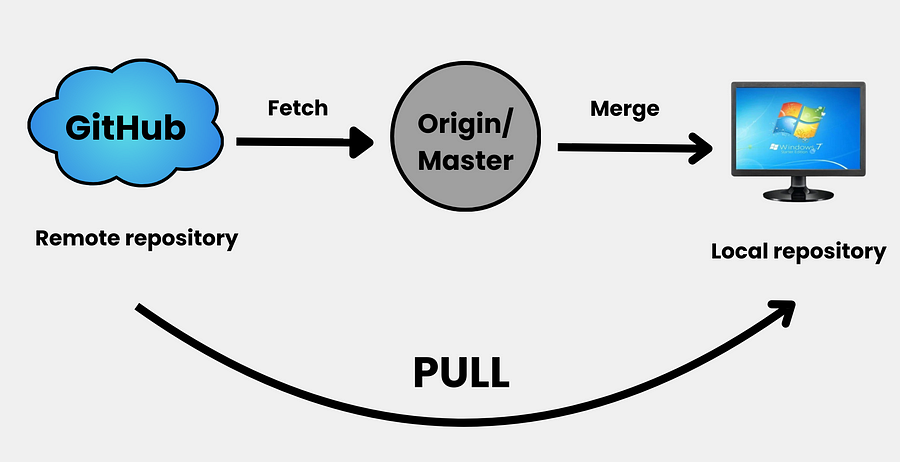
- ⬇️ Git Pull Command
- 🔚 Conclusion: Your Git Journey Starts Here
Introduction to Git
Git is a distributed version control system that facilitates productive collaboration amongst developers by tracking file changes over time. It is essential for software development and the most popular version control system in the world.
Features of Git
● Distributed system: Every developer has a full copy of the project history.
● Tracking changes: You can see what was changed, when, and by whom.
● Branching and merging: You can create separate branches to work on new features or bug fixes, then merge them back into the main code.
● Collaboration: It enables teams to collaborate efficiently through platforms like GitHub or GitLab.
What is GitHub? Are Git and GitHub the same or different?
GitHub is an online platform that hosts Git repositories. It allows developers to store, manage, and collaborate on code repositories in the cloud.
Git is not the same as GitHub.
Configure Git for the First Time
Before making your first commit, it’s important to configure Git with your personal information. This step ensures that your name and email are correctly associated with your commits.


General Git Features
To start tracking a project with Git, you first need to initialize a Git repository using the command.
 This tells Git to begin monitoring the current folder. Once executed, Git creates a hidden .git directory inside the folder. This directory contains all the necessary files Git needs to track versions, manage branches, and store history.
Staging Files / Adding Files to Git Repository
Staged files are files that are ready to be committed to the repository you are working on.
When you first add files to an empty repository, they are all untracked. To get Git to track them, you need to stage them, or add them to the staging environment.
When you first add files to an empty repository, they are all untracked. To get Git to track them, you need to stage them, or add them to the staging environment.

We can add all the staging files into the repository as,

Making a Commit of Repository
In Git, a commit is a snapshot of your project’s files at a particular point in time, effectively creating a version of your project. It’s like a save point, recording the changes made since the last commit along with a descriptive message explaining the modifications.
When we commit, we should always include a message.


Git Commit without Stage
Sometimes, when you make small changes, using the staging environment seems like a waste of time. It is possible to commit changes directly, skipping the staging environment.
Status of Files and Log
The git status command displays the state of the working directory and the staging area.
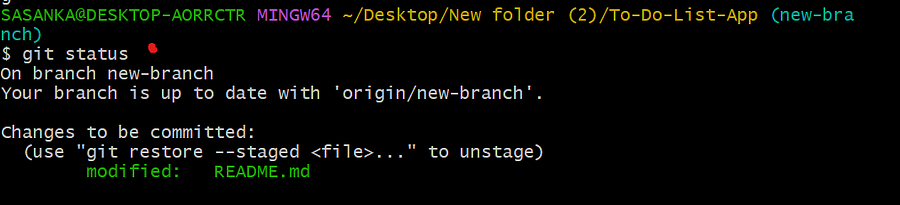
Files status in a more comprehensive way:
git status --short to show a concise summary of the current status of your working directory and staging area.


 When you run the
Great Overview of Git
Thank you for your valuable feedback.
This Looks really good!
Thank you for your valuable feedback.
Great Work!
Perfect Explain!