CoDeKu DevOps Academy Blog - DevOps & Cloud Blogging Platform
Table of Content
Introduction 📄
In this article, we talk about how to make an API using Node.js and Express.js, and we are hosting that backend API on Docker containers. So let’s dive to the deep. You can use all the codes and resource files using this link.
Developing the Backend API 👩💻
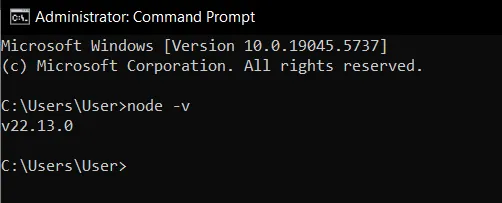
For this project, we need to use Node and Express. So, first, you need to install Node on your local machine. You can check whether your machine has installed Node using, the node -v command. Then you see the below type of screenshot, your machine has Node.
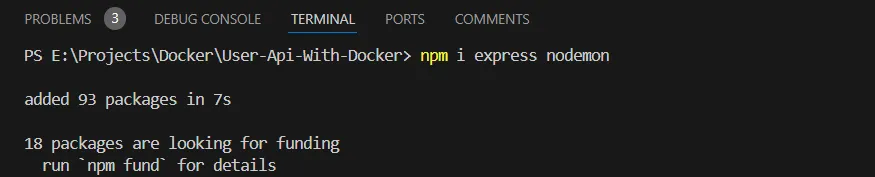
If not, you can install Node on your machine using this link.. After installing Node, you can develop your project. First, you must specify a specific space on your machine to develop your project. And then you have to install Express on your project. And we can install Nodemon to simplify the development process. We can use the npm i express nodemon command to do that.
Here, we use Express to develop the project, and Nodemon to make the refresh process easier. Below is the way how to customize the package.json file to use Nodemon.
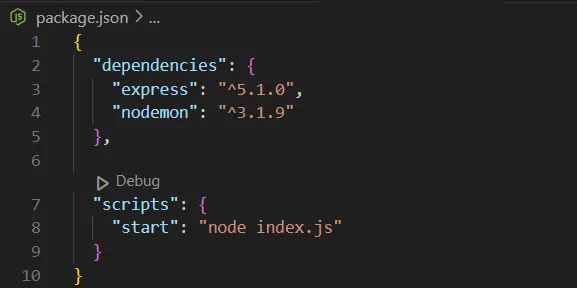
This means when we need to run the application that we built, we can use the npm start command. The most important thing about this is, that after making a change to your project, don’t need to type the npm start command again and again. We can just save and the project is refreshed and run automatically.
Then we can start our development process. First, we have to create a file called index.js. And it should be as below.
const express = require('express');
const app = express();

app.use("/", (req, res) => {
  res.json({
    Name: "Ramitha Heshan",
    Email: "ramitha2002@gmail.com"
  });
});

app.listen(3000, () => {
  console.log("Server is running on port 3000");
});
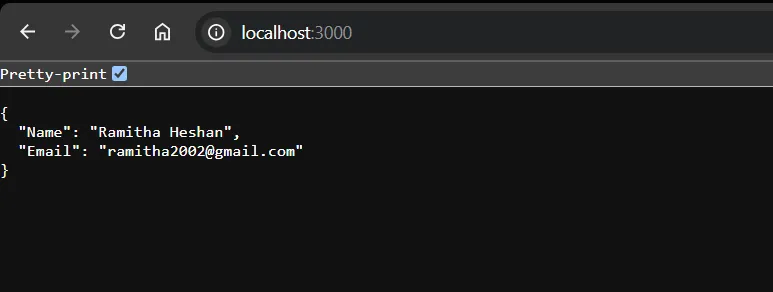
Now you can open your browser and navigate to the localhost:3000. Then you will see the output like below.
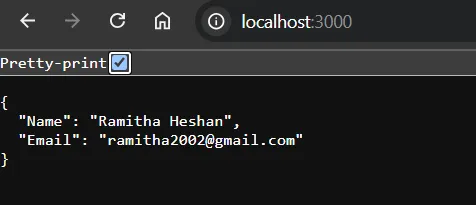
This means we have successfully created our backend API using Node and Express. Then let’s move to the containerization part.
Containerization part 🐳
First, we have to build a docker image for this backend. For that, we can create a docker file. So let’s see how to create a docker file.
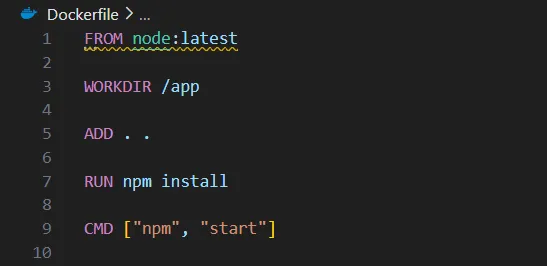
First, we have to specify the base image. So here we are developing the project using Node, we can use node as our base image. Secondly, we need to specify a working directory. To do that, we can use the WORKDIR /app command. This means, checking if there is a folder called app in this dictionary. If it is not, it creates a directory called app and makes it as the working directory. In the fifth line, we can add all the files (first dot) to the new working directory (second dot). Next, we have to install our dependencies. We can use the RUN npm install command. Finally, we have to run our application. To do that we can use the CMD [‘npm’, ‘start’] command.
After developing this docker file, we can create the docker image using this docker file. Here we can use the docker build -t user-api-image:v1 . command.
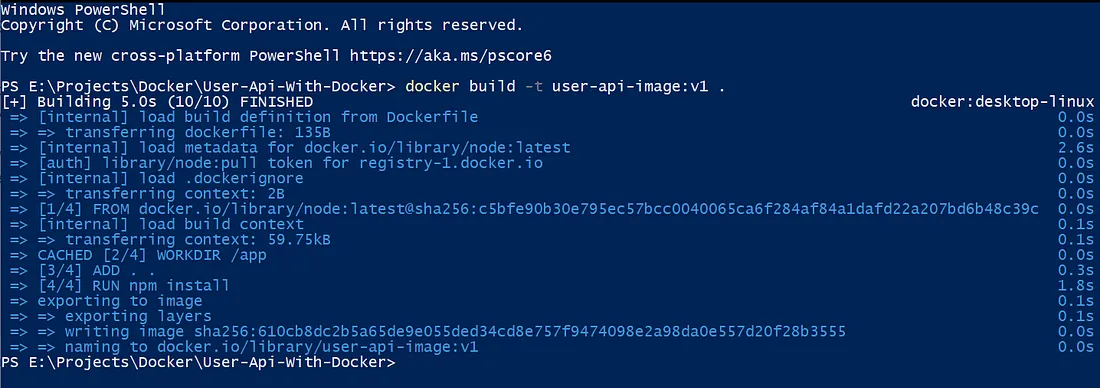
Above is the way how build the docker image. Now we can create a docker container using this docker image. To do that, we can use the docker run -d –name user-api-container -p 3001:3000 user-api-image:v1 command.

Now we can check our hosted docker container and the local machine’s project one by one.
Testing Process ✍
Let’s check our local machine’s project. This project is run on the port number 3000. Open your browser and navigate to the localhost:3000. Then you can see the below type of output.

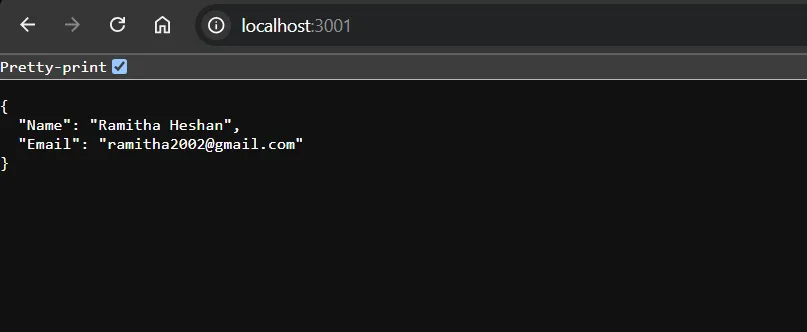
Now let’s check the containerized API. To check this we have to navigate to the localhost:3001 port. Then also you can see the same output.
So let’s see what happens when stopping our docker container. To do that I use the docker stop user-api-container command. And let’s check again ports 3000 and 3001 one by one.
Port number 3000 or the local machine’s project is working properly. But let’s check the port number 3001.
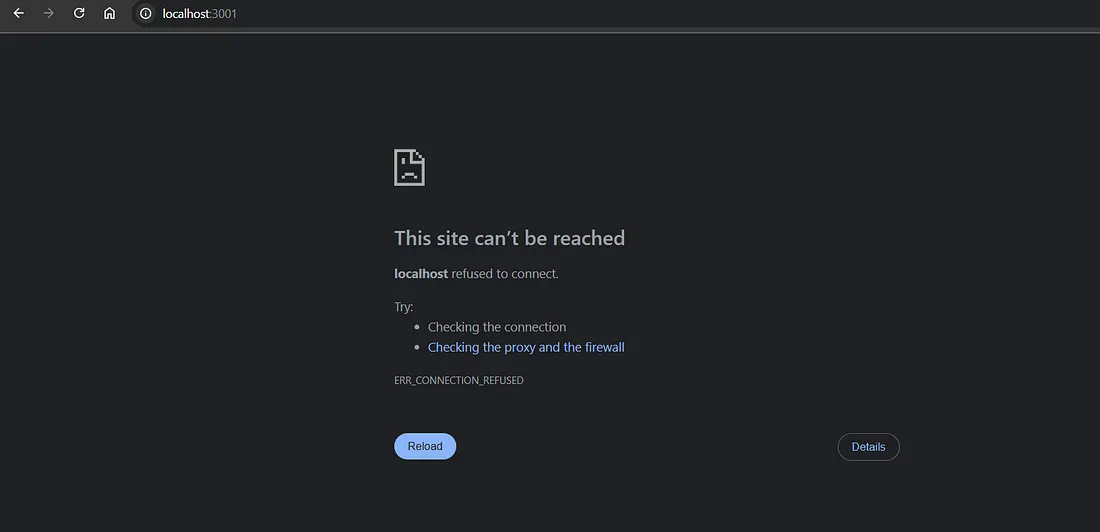
You can see the port number 3001 does not work properly. This means we have successfully done our backend API containerization part.

Ramitha Heshan
One comment
Comments are closed.
Great tutorial !!