CoDeKu DevOps Academy Blog - DevOps & Cloud Blogging Platform

Introduction: CI/CD Pipeline with Docker and GitHub Actions 🚀
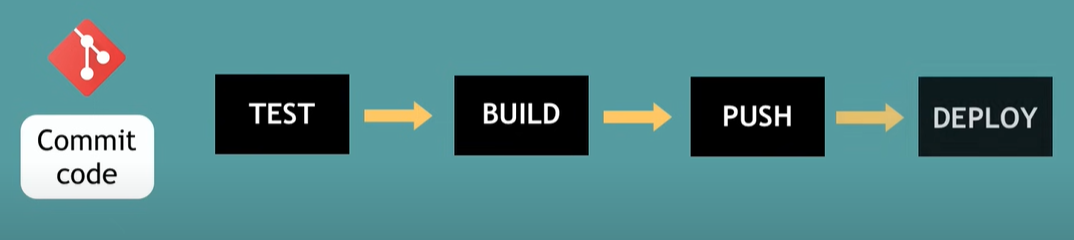
CI/CD pipelines automate the process of integrating, testing, and deploying code changes, making software delivery faster and more reliable. By combining Docker’s containerization capabilities with GitHub Actions, developers can streamline their workflows directly within GitHub.
In this blog, we’ll briefly guide you through setting up a CI/CD pipeline using Docker and GitHub Actions, enabling you to automate builds, tests, and deployments for your projects with ease. Let’s get started!
Table of Content
📘 Introduction to GitHub Actions
GitHub Actions is a powerful feature of GitHub that allows you to automate, customize, and execute software development workflows directly in your repository. It integrates seamlessly into your development lifecycle and supports Continuous Integration/Continuous Deployment (CI/CD) processes, among other automation tasks.
Key Features of GitHub Actions
- Automation: Automate repetitive tasks like testing, building, and deploying code whenever changes are pushed to the repository.
- CI/CD Integration: Simplify the implementation of CI/CD pipelines to ensure code quality and faster delivery.
- Event-Driven: Workflows can be triggered by various events, such as:
- 🔹 Pushes to branches.
- 🔹 Pull requests.
- 🔹 Issue creation or labeling.
- 🔹 Scheduled times (cron jobs).
- 🔹 Manual workflows triggered via the GitHub UI.
- Custom Workflows: Define custom workflows using YAML configuration files stored in the
.github/workflows/directory of your repository. - Marketplace: Reuse thousands of prebuilt actions from the GitHub Marketplace to extend functionality.
- Scalability: Run workflows on GitHub-hosted runners or self-hosted runners (machines you configure).
🔄 What Are Those Workflows?
Developers often face tasks that are time-consuming and tedious, which is why automation is essential. For example, when using GitHub, many developers upload their open-source projects, allowing the community to utilize, contribute to, and enhance these projects. This includes adding new features, submitting pull requests, and more.
When working on organizational tasks, such as reporting a bug in a repository, creating an issue, submitting a pull request to address that issue, and merging the fix into the master branch of the project, the workflow can become highly tedious. To simplify and automate these processes, GitHub Actions were created.
Tip: In GitHub Actions, the most commonly used workflow is the CI/CD pipeline, which automates integration and deployment processes.
🚀 Why another CI/CD tool : Benefits of GitHub actions
- 🔁 Use same tool instead of 3rd party integration and manage is separately: No need for 3rd party CI/CD tools everything runs inside GitHub, making setup and management simpler.
- 💻 Setup the pipeline is easy: Pipelines can be created quickly with ready-to-use templates or YAML files.
- ⚙️ Tool for developers: Designed for developers, integrated directly with your repositories.
- 📁 Automate everything within the GitHub flow: Automate builds, tests, deployments, and more—all within your existing GitHub workflow.
📈 Why Is the Setup Easier?
When you think about a CI/CD pipeline, one of the most important aspects is integrating with various tools.
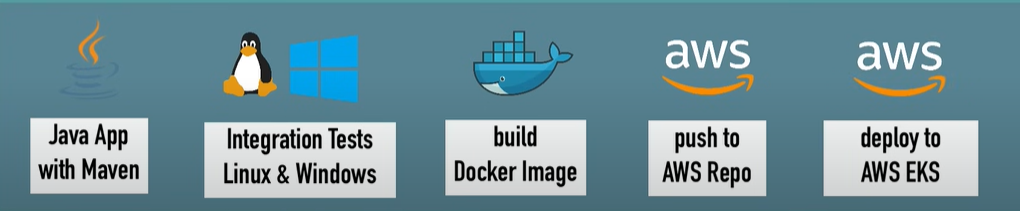
In the above process, you need to configure everything manually, such as installing Java, Maven, and Docker, as well as configuring plugins. This can be cumbersome and time-consuming.
Instead, you might prefer a simpler way, where you can specify an environment that already includes tools like Docker and Node.js, with specific versions, without needing to install or configure them yourself. By simply connecting to the target environment, you can deploy your application with ease.
⚙️ CI/CD with GitHub actions setup :
This process we create docker image and push into docker hub.
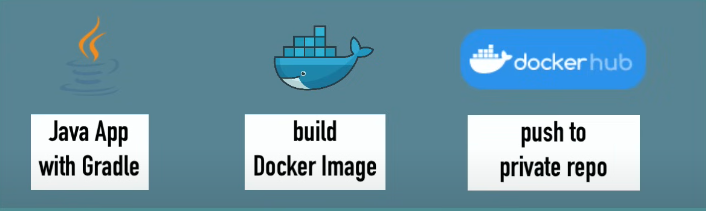
🔹 First, create a new repository on GitHub and then push the relevant files from your project to it. In this guide, I will demonstrate using a Java project with Gradle (you can use any type of project you prefer)
Then you can start automating your tasks under the github actions.
🔹 Go to the inside that repository select Github Actions on top.Now your’re on github actions section and select appropriate automation type that matching your project type (Java, Python, Docker, …etc). In this situation i will use to “Java with Gradle”
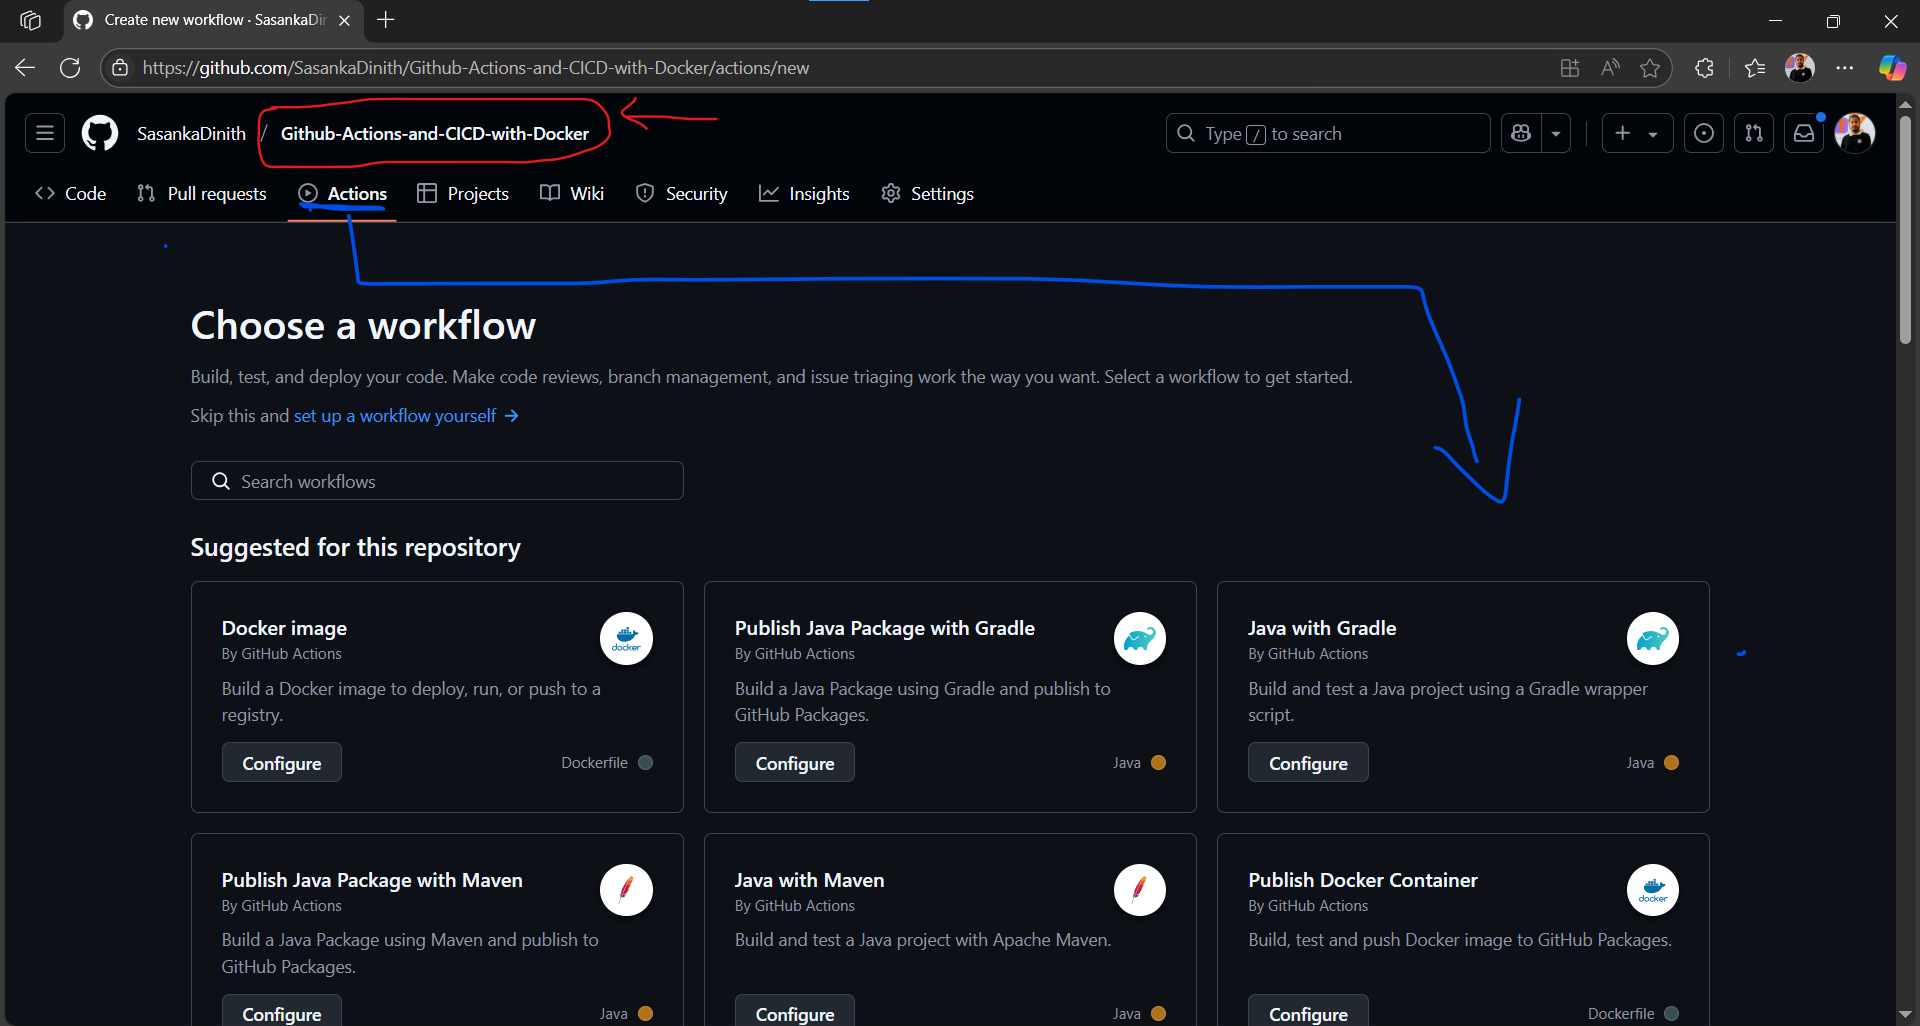
🔹 Then click the Configure button on that it will open under workflow folder pre configured ymal file.
Then you can start automating your tasks under the github actions.
🔹 Go to the inside that repository select Github Actions on top.Now your’re on github actions section and select appropriate automation type that matching your project type (Java, Python, Docker, …etc). In this situation i will use to “Java with Gradle”
🔹 Then click the Configure button on that it will open under workflow folder pre configured ymal file.
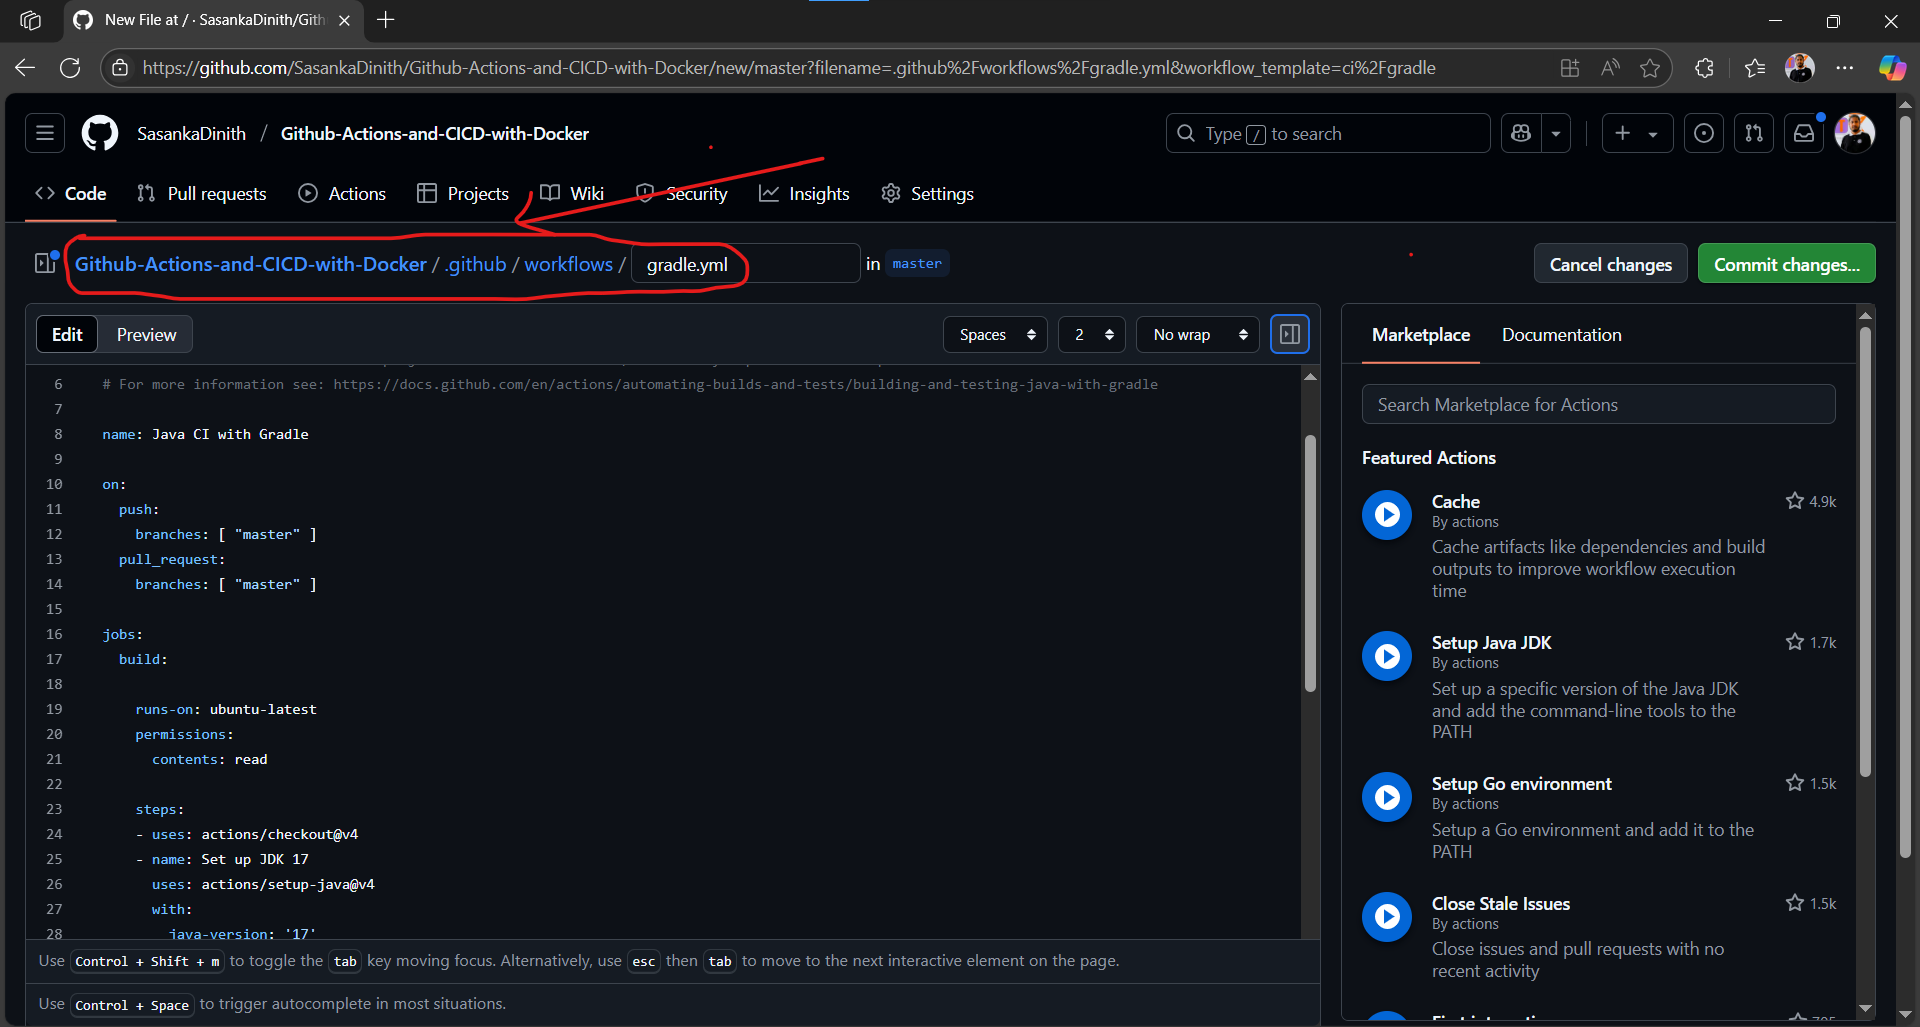
🔹 Now you can change the ymal file name if you want then click the Commite changes button then select create a new branch item and click Propose changes button.
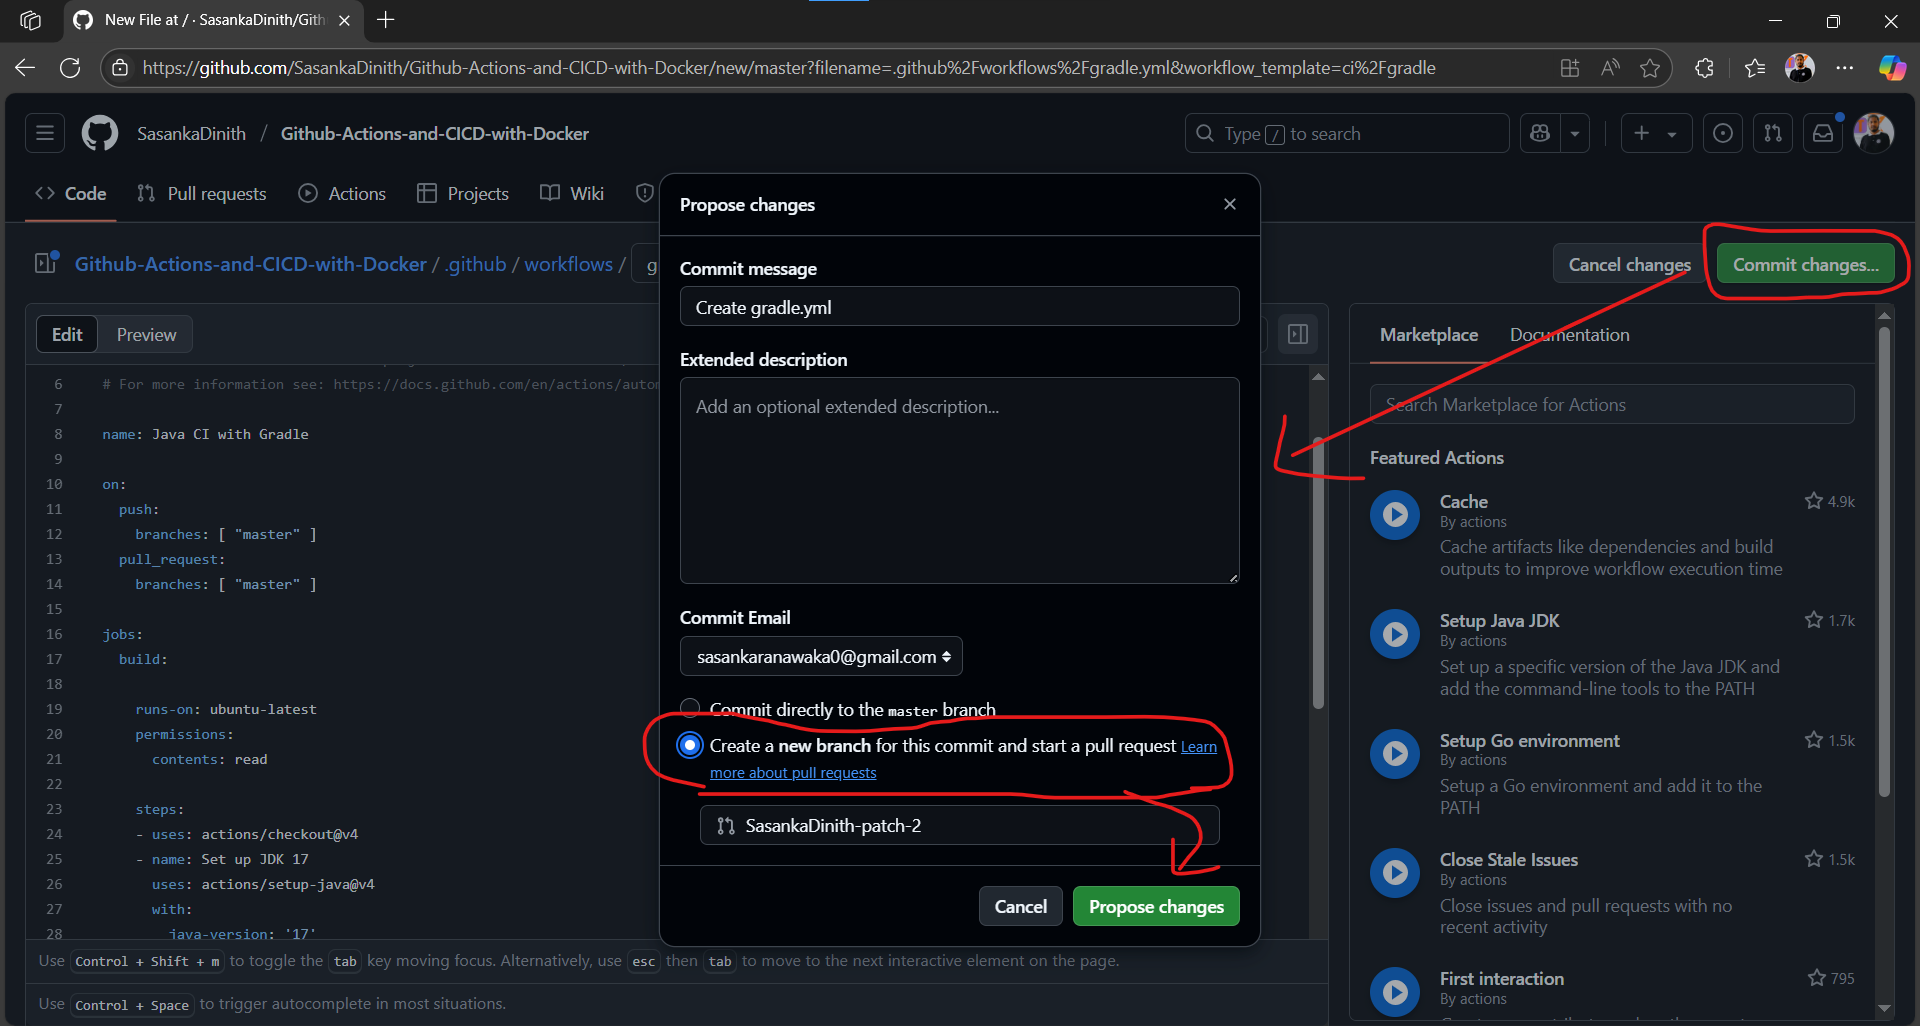
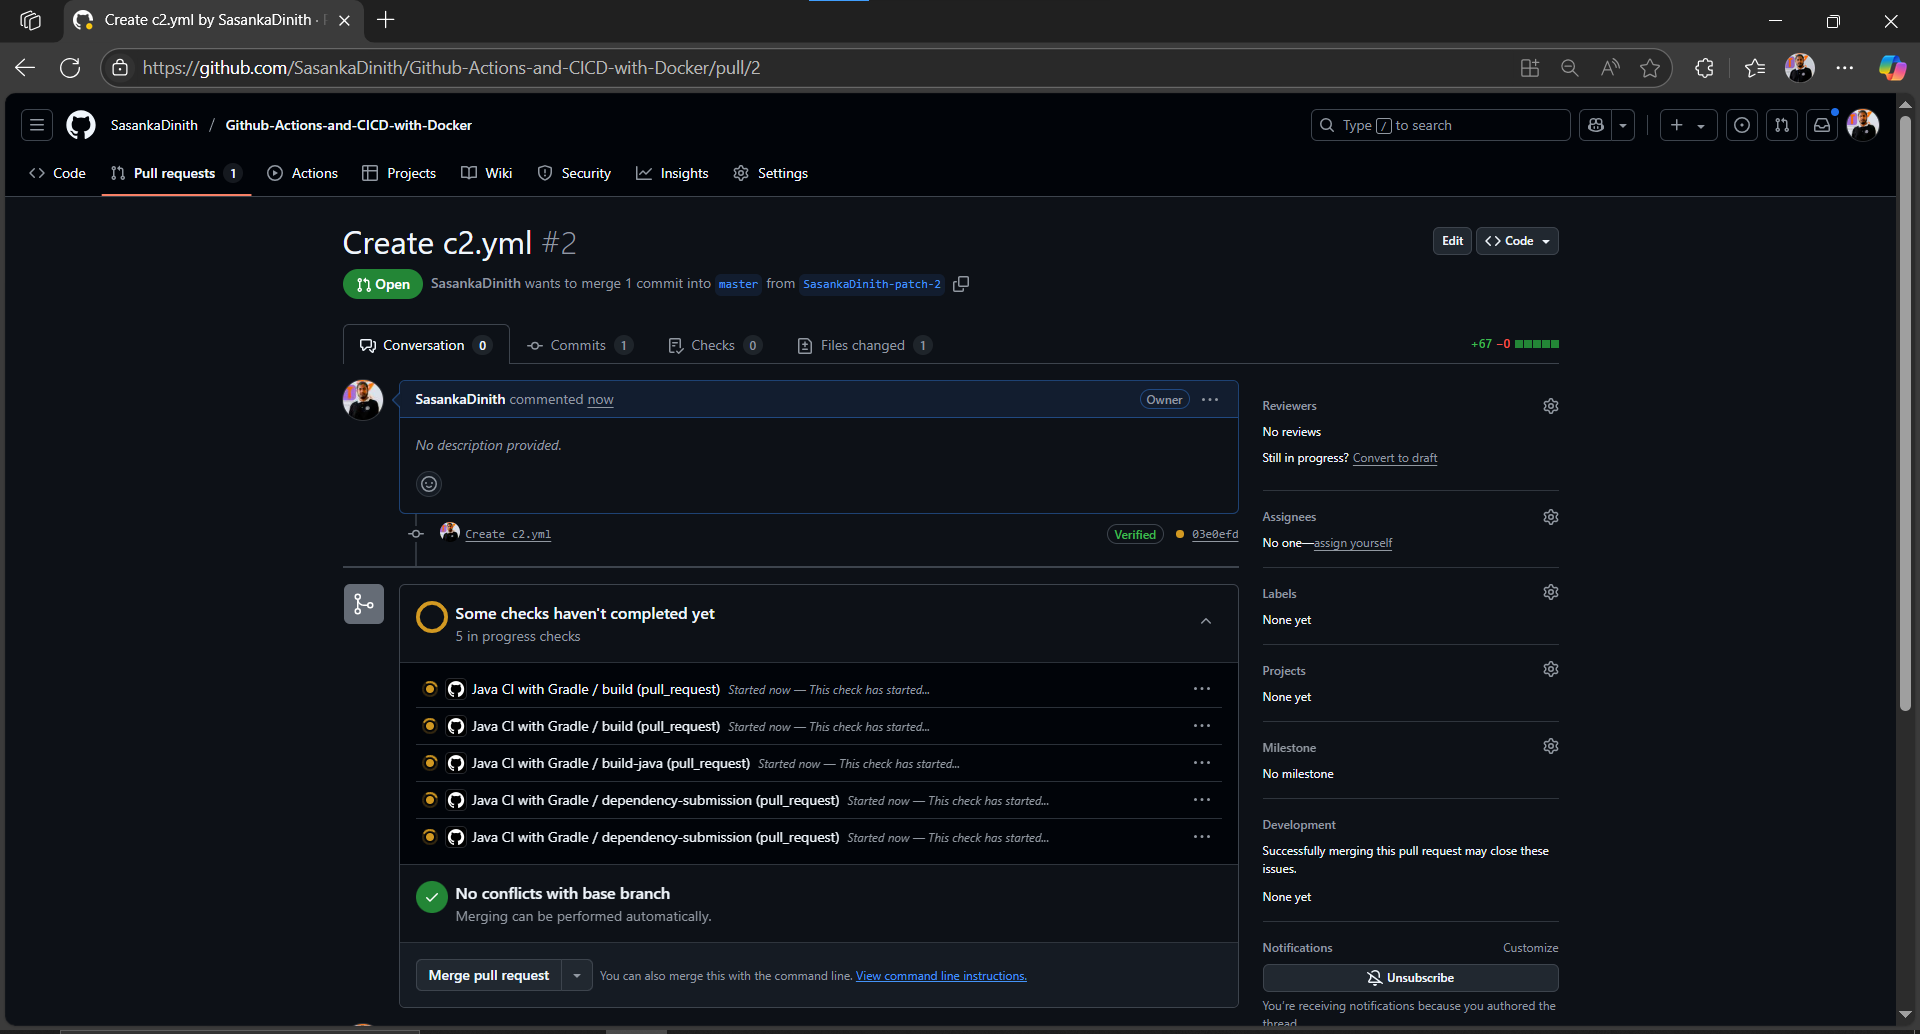
🔹 After click the Create Pull request button and create a pull request from that new branch.
🛠️ Modify the YAML File and Commit Changes
In this scenario, we made modifications to certain parts of the YAML file to ensure that the GitHub Action setup is configured correctly. Additionally, we added essential configurations required for the workflow to run as expected.
Example: Changes might include updating environment variables, adding new steps to build or test your code, or defining specific triggers for the workflow.
🔹 Updated YMAL file as follows,
name: Java CI with Gradle

on:
  push:
    branches: [ master ]
  pull_request:
    branches: [ master ]

jobs:
  build-java:
    runs-on: ubuntu-latest

    steps:
    - uses: actions/checkout@v2

    - name: Set up JDK 1.8
      uses: actions/setup-java@v1
      with:
        java-version: 1.8

    - name: Grant execute permission for gradlew
      run: chmod +x gradlew

    - name: Build with Gradle
      run: ./gradlew build

    - name: Build and Push Docker Image
      uses: mr-smithers-excellent/docker-build-push@v4
      with:
        image: sasankaranawaka/githubactions
        registry: docker.io
        username: ${{ secrets.DOCKER_USERNAME }}
        password: ${{ secrets.DOCKER_PASSWORD }}
In above code snippet added at the end new part as,
    - name: Build and Push Docker Image
      uses: mr-smithers-excellent/docker-build-push@v4
      with:
        image: sasankaranawaka/githubactions
        registry: docker.io
        username: ${{ secrets.DOCKER_USERNAME }}
        password: ${{ secrets.DOCKER_PASSWORD }}
This code snippet is added at the end of the YAML file because it performs the final step in the workflow: building and pushing the Docker image to the Docker registry. It relies on earlier steps, like building and testing the application, to complete successfully before running
This code snippet uses secret keys (DOCKER_USERNAME and DOCKER_PASSWORD) to authenticate with the Docker registry securely. These keys are stored in the repository’s Secrets settings in GitHub, ensuring sensitive information like login credentials is not exposed directly in the workflow file.
Steps to Add Secrets in GitHub:
- Go to the Settings tab of your repository.
- Select Secrets and variables → Actions.
- Click New repository secret.
- Add secrets:
- Name:
DOCKER_USERNAME, Value: Your Docker Hub username. - Name:
DOCKER_PASSWORD, Value: Your Docker Hub password or access token.
- Name:
- Save the secrets.
Accessing Secrets in the Workflow
Once added, the workflow accesses these secrets using ${{ secrets.DOCKER_USERNAME }} and ${{ secrets.DOCKER_PASSWORD }} during the docker-build-push step. This ensures secure and automated deployments.
🔹 Next step is log into your Docker hub and create a new repository for push this docker image(The image part added your Docker hub new repository name)
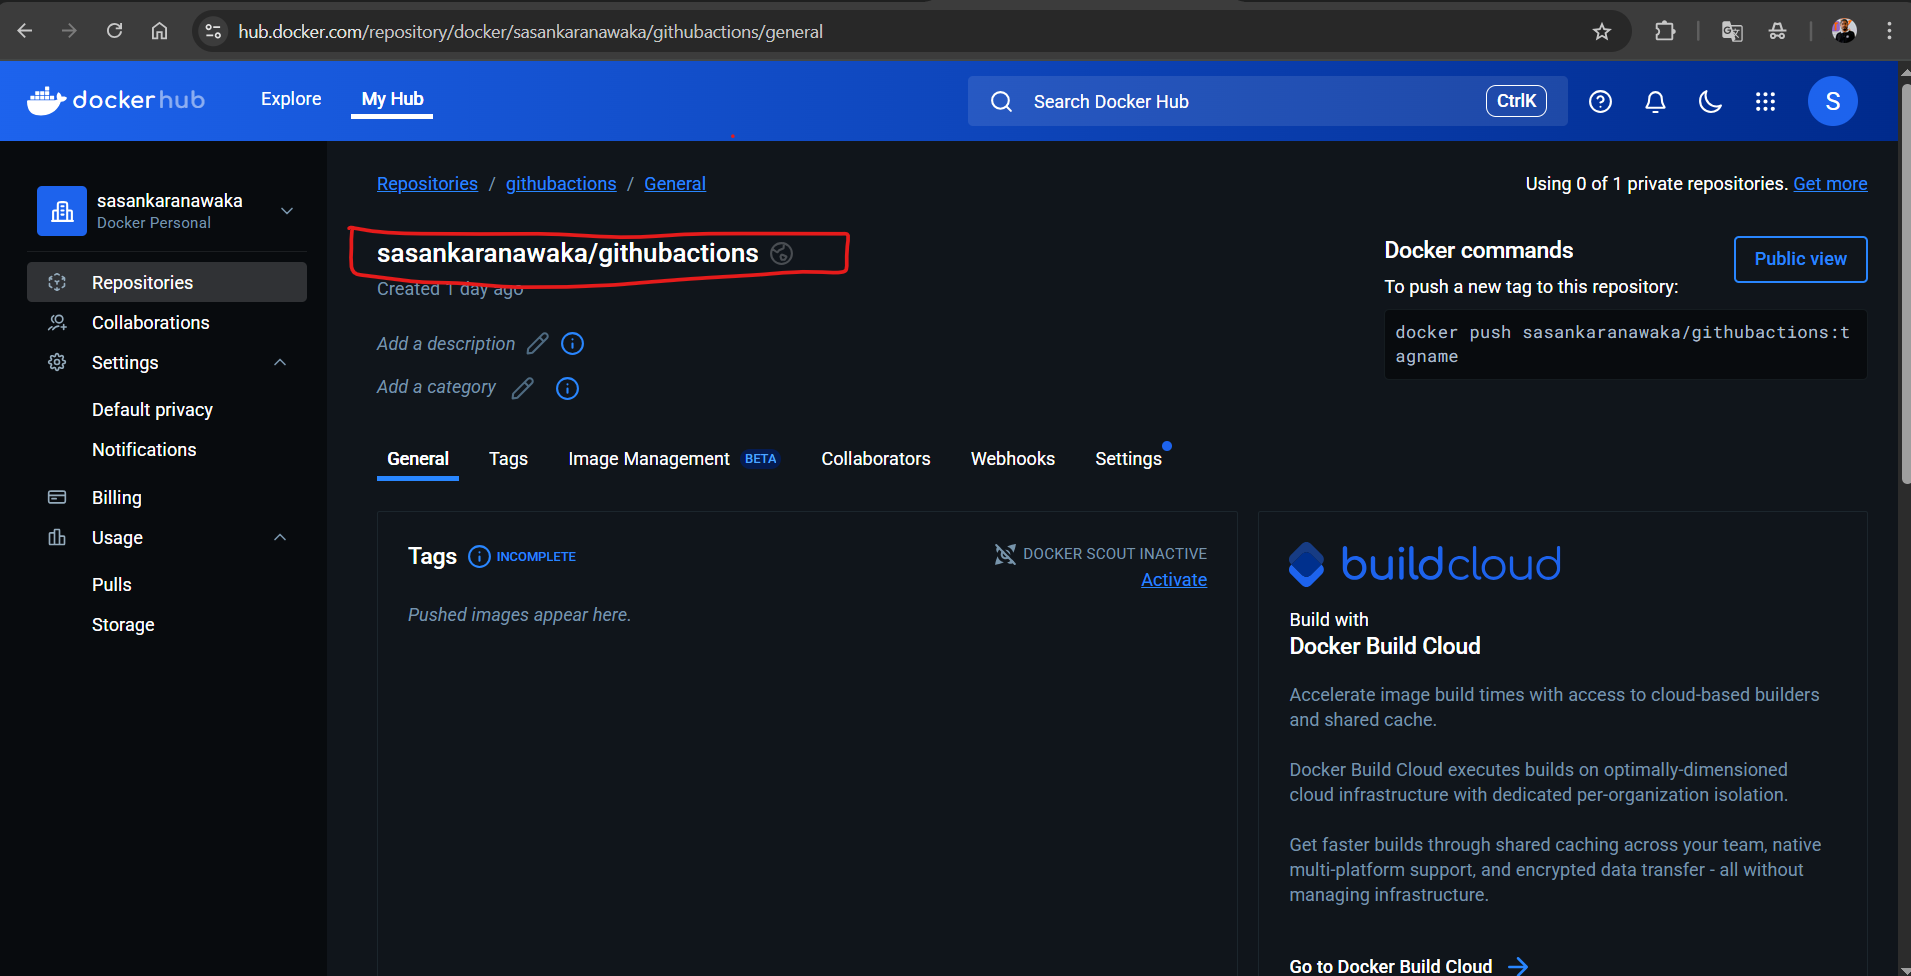
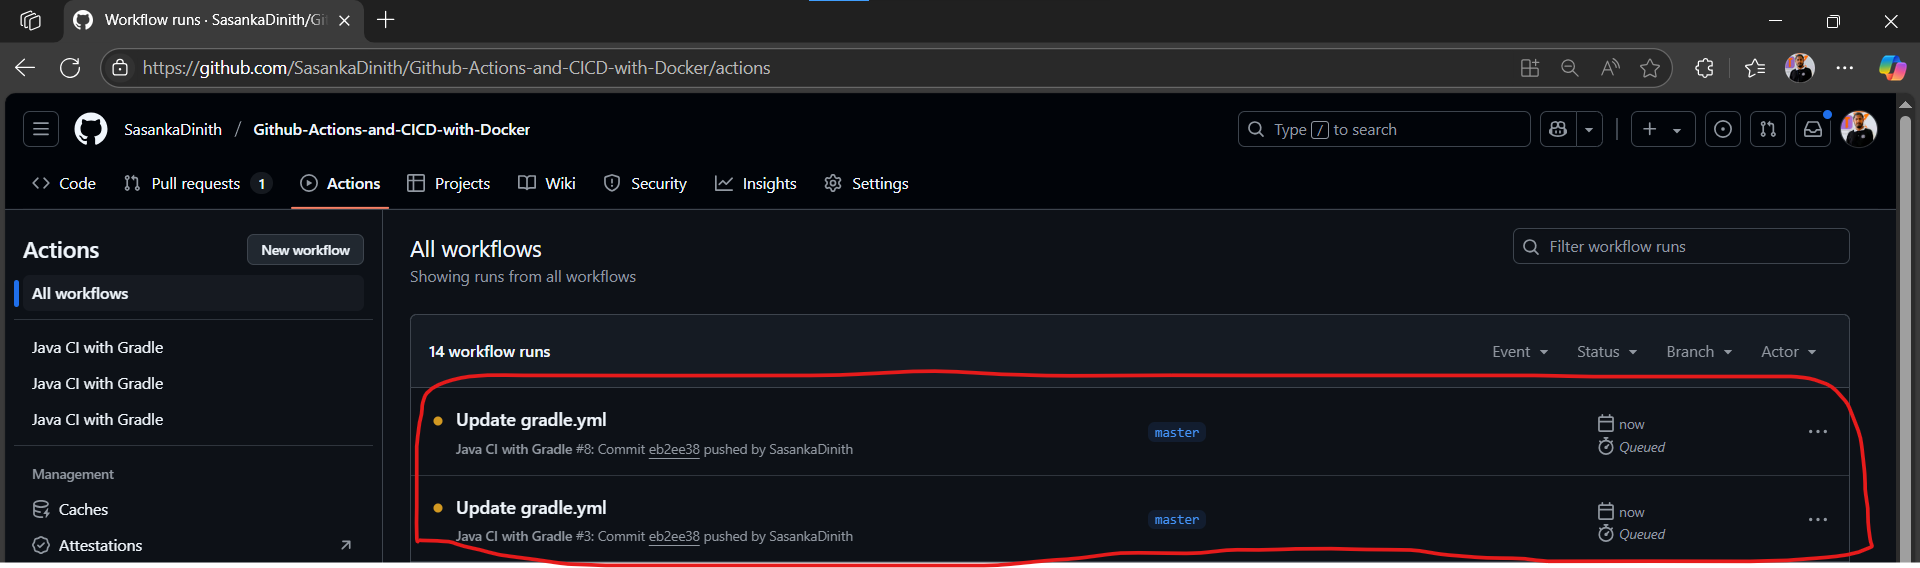
🔹 So,“Finally, after clicking the ‘Commit changes’ button to save, you can see under the Actions tab that the YAML file is being updated.”
✅ Verifying the Success of the Process
After clicking the Commit Changes button, the YAML file will be updated. This triggers the workflow to create a Docker image based on the specified configurations in the file. The Docker image is then pushed to the newly created repository in Docker Hub.
Steps to Verify:
- Wait for the GitHub Actions workflow to complete.
- Go to your Docker Hub account.
- Refresh the Repositories tab in Docker Hub.
- Look for the newly pushed Docker image from the workflow.
Once the image appears in Docker Hub, it confirms the success of the process.
🎯Conclusion
In today’s fast-paced development world, automation is not optional—it’s essential. CI/CD bridges the gap between development and deployment by ensuring that code is tested, integrated, and released in a reliable, repeatable way.
GitHub Actions makes it incredibly easy to implement CI/CD directly within your GitHub repositories, without the need for external tools. Whether you’re building small personal projects or managing production-level applications, adopting CI/CD practices with GitHub Actions will help you deliver faster, reduce errors, and improve your overall workflow.
Start small, automate one thing at a time—and soon, you’ll wonder how you ever worked without it.
